#3 Enemy AI
Minimum Viable Enemy
Before I continue adding more stuff to the player character or exploring other game mechanics, I wanted to start with another key feature of the game, the enemies characters.
It is vital to include a simple enemy this early into the development of the project, as its implementation is going to influence how other parts of the game are designed later on. In the case of this prototype, a simple enemy should:
- Receive player attacks
- Wander around a specific area
- Spot the player if it walks in front of it
- Chase and attack the player
- Flee from the player
Choosing Behaviour Trees
After refactoring the player character controller using a finite state machine the first thought that crossed my mind was to use another one to implement the enemy AI, as that would be easy to do.
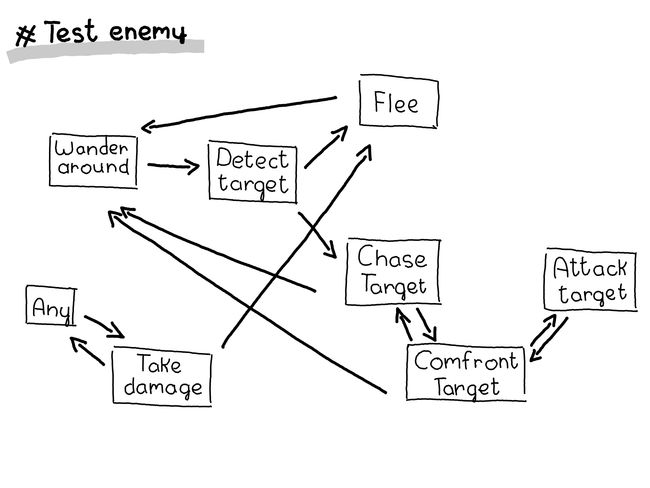
To have a clear perspective of the requirements, I draw a graph with the different states the enemy could do and then I started drawing lines representing the transitions from state to state.

I wasn’t finished drawing all possible lines when I noticed the number of transitions was growing exponentially. If this was supposed to be a “simple” enemy, I didn’t want to imagine a complex one. Clearly, I had bumped into one of the limitations of FSMs.
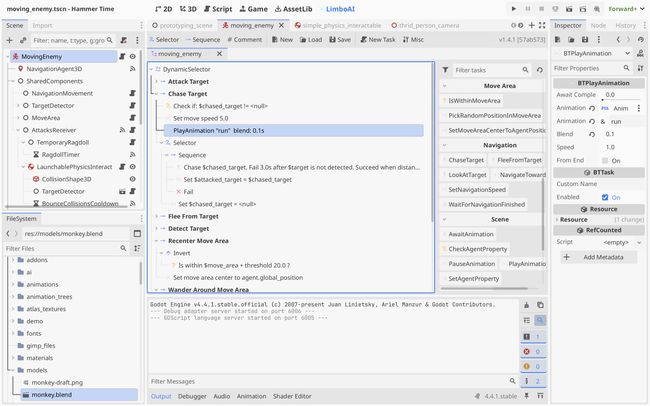
After doing some research on design structures for enemy AI, I decided to go for Behaviour Trees. I wanted to focus entirely on the design of the enemy, and not on writing my own implementation of BTs, so I decided to use the LimboAI asset.
My first impression using this asset was revealing: All my previous attempts writing my own BT tools were not good enough. I highly recommend this addon. It is feature rich, well documented and easy to use.
Designing Behaviours
It took me a while to get a grasp of the workflow, as my head was stuck in the “state-transition” mentality from FSMs. However, once it clicked, everything went smooth and I was able to implement all the behaviours I listed at the beginning of this devlog entry and more.

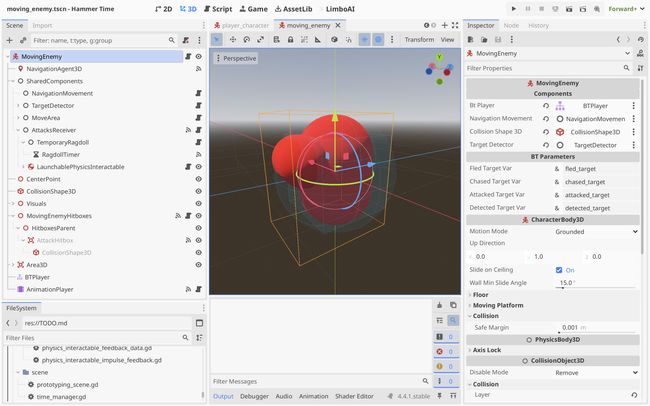
Before I show you some of the cool additions I included, let me first write a quick overview of how everything is structured inside the enemy scene; Next to the character model, its CollisionShape3D and AnimationPlayer nodes, there are now two other elements: A node called BTPlayer where the tree is defined including all actions and conditions, and an empty node which parents what I refer to as “Shared Components”.
These shared components are individual bits of functionality that might be used by one or more tasks of the tree. For example, one shared component is NavigationMovement and it moves and rotates the character. Then, some of BT actions I wrote like NavigateTowards, Chase, Flee and WaitForNavigationFinished simply access this component to achieve their purpose.
These components can also influence how the tree is travelled by writing data into its Blackboard. For example, when the player attacks the enemy, AttacksReceiver toggles a flag on it which causes the BT to travel to the branch “Flee from player character”.
Showcase
Now that I covered how everything is put together behind the scenes, I can finally describe how this simple enemy is supposed to act during gameplay:
- By default, this enemy will move inside a circular area. If it spots the player character, it will give chase.
- If the enemy can’t catch the player, it will give up the chase after a couple of seconds and will return to its patrolling area.
- If the enemy catches the player, it will start attacking at them.
- If the player character attacks the enemy with a light attack, it will temporarely turn into a ragdoll and then flee the moment it recovers from the attack.
- If the player character attacks the enemy with a heavy attack, it gets defeated.
The above video shows the game running in the Godot editor, with visible collision shapes and the BT debug menu enabled. This way, it is easier to understand and visualise the AI of the enemy in action.
Ragdolls
About that ragdoll feature, the way it works is very interesting. I built this feature by using the delegation design pattern. Because this enemy receives player attack signals through the InteractableHurtbox node I covered in the entry #1 of this devlog, it can simply forward these signals to other interactable implementations.

In this case, a LaunchablePhysicsInteractable instance which I placed inside the enemy itself. This interactable implementation already handles physcis collisions, so it simply needs to be forwarded some of the attack signals from the AttacksReceiver node.
Whenever an attack is received, the enemy disables its CollisionShape3D and lets the interactable inside it work for a couple of seconds. The enemy simply has to copy its Transform3D during this time. Another benefit of this implementation is that it allows players to launch enemies towards other enemies to chain attacks and cause more damage.
Exploring Enemy Ideas
Developing this simple enemy has been a lot of fun. Nonetheless, it is nothing but a proof of concept of what could be built using this workflow. While I was working on it, I actually came up with some cool ideas for “real” enemies I would love to include in the game if I had the resources for it. These are a few of them: