#4 Player Visuals
Current Limitations
The blue capsule that currently represents the player character has been quite useful during these earlier stages of development. With a simple level of detail and animation work it has allowed me to “preview” the game feel of the different actions I wanted in the game: movement, attacks, jumps…
However, as the project kept growing I noticed that some of the features I wanted to work on heavily relied on the visual aspect of the character. The capsule placeholder was slowly becoming a weak foundation on which to build on.
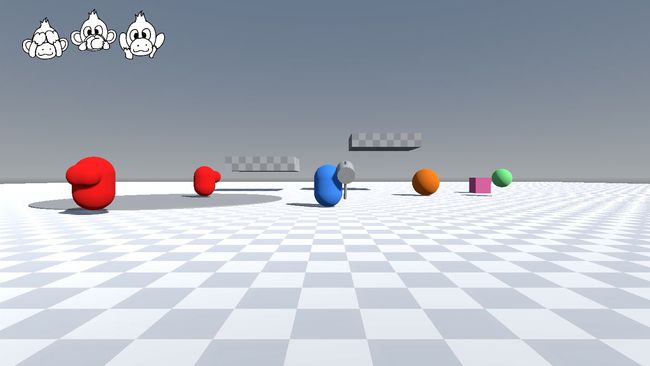
To better explain what I mean by that, here are some features I couldn’t properly work on because of the current, temporary player visuals:
Animation transitions: Yes, the
AnimatorTreenode the character uses features transitions, but most animations look very similar and that makes it complicated to gauge how well they work.Feet placement: The desired visuals for the character is a humanoid monkey that walks on its legs, which means as a developer I need to be conscious about how its feet are placed in the game world. Do the feet need inverse kinematics when players go up and down slopes? Does each step of the walking cycle match the speed at which the player moves?
Attack Hitboxes Animations: At this moment, the attack hitboxes are animated in the same
AnimationPlayernode as the blue capsule. Before I add more attacks or I continue working on the attack system, I need to evaluate the best way to animate them along the animations imported from an asset, like the ones from a skeleton rig animated in Blender, which is how I plan to animate the character.Nicer Animation Work: This point is a bit self explanatory, but having nicer animations really add to the overall UX of the game. On top of that, once the animations are imported into the prototype, I will be able to work on some other effects like Squash & Stretch and Inertia Rotation.
Rigging and Animating
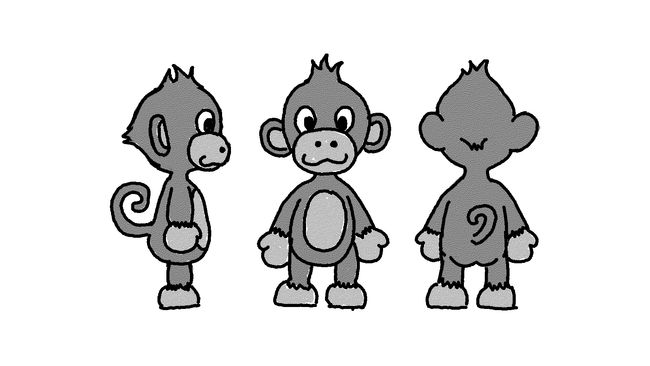
In the very first devlog entry I shared the above drawing, which is a concept art of what I had in mind for the player character model. At a qucik glance, it is easy to tell why I am a developer and not an artist.
This is a 3D game, which means I need to turn this draft into a 3D model I can rig and animate. I have some experience using Blender but, if my drawing skills are bad, my modelling skills are worse. Luckily, I only need a model that has the correct proportions of the monkey to create a rig for it.
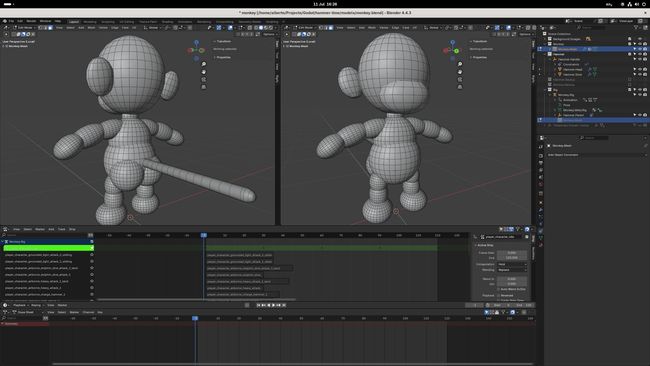
I assembled a simplified model by placing spheres and cylinders together. With that ready, I created a skeleton rig and I attached it to the model, I was able to start animating after that.
These visuals are already a huge leap from the blue capsule. In any case, if the project were to continue after the prototype phase, I would commision a more elaborated model to an artist and simply attach the rig to it.
Addressing the Limitations
Once I was happy with the animations I had made, I exported the new simplified model along with its rig to Godot and started replacing the previous visuals. At this point I was ready to start tackling some of the limitations covered in the introduction of this devlog.
First of all, I tweaked and fixed some of the animation transitions now that I was able to debug them better. The new animations made me realise that the player character’ FSM was missing a “Landing” state on which the character would begin transitioning to grounded animations a bit before it landed on the ground.
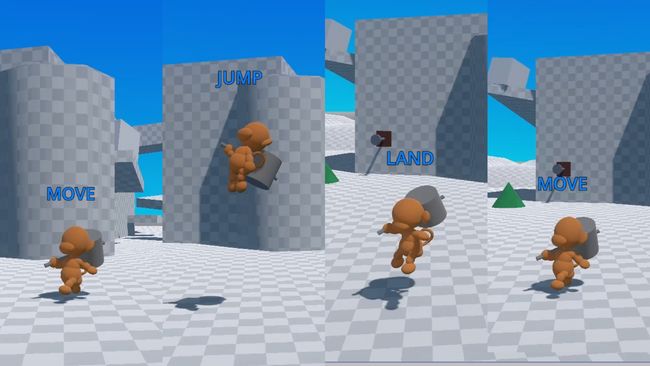
Right after implementing that I tested a couple of ways to migrate or adapt the attack hitboxes animations to the new animator. After some reading of the Godot documentation I learnt that on the import settings of 3D assets there are two toggles that enable adding and keeping new tracks on top of the imported animations even when the asset is updated or reimported. This was exactly was I was looking for so I simply moved the hitboxes animation tracks from the blue capsule animations to the new ones bundled in the monkey rig.
Finally, the feet placement turned out to be a smaller concern as I initally thought. Matching the movement speed to the pace of the steps of the walking animations was not complicated. In addition to that, the short legs the humanoid model has mean that even when players go up and down on ramps the feet are nicely resting on the ground, so no IK is really needed for it.
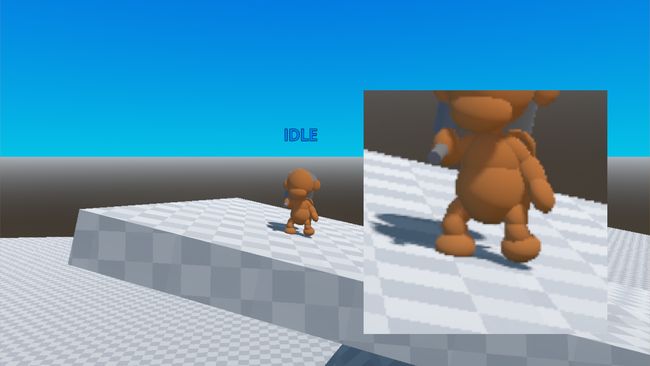
As for the nicer animation work, I ended up implementing a Squash & Stretch system and Interntia Rotation, which I will cover in greater detail next, together with the Ramp Support I also added.
Inertia Rotation
Let me start this section by clarifying that Inertia Rotation is a term I came up with to represent an effect I have seen in many games before but I was never able to figure out its real name. Why I mean by it is the “sideways” rotation applied to the model of the player character whenever it turns very quickly to the sides. This feature is present in most mainline 3D Mario games, and I always wanted to inlcuded in a game.
The way I implemented this in the project is by applying a rotation using the direction the player is moving as axis, with a magnitude that depends on the dot product between the current horizontal velocity direction and the movement input vector.
A simplifyed version of the code would look like this:
## The Node3D which is going to rotate. It should be a child of the CharacterBody3D and a parent of the model visuals.
@export var _inertia_rotation_pivot: Node3D
@export var _max_rotation_angle: float = deg_to_rad(60.0)

func _physics_process(_delta) -> void:
    var horizontal_velocity_direction: Vector2 = Vector2(character_body_3d.velocity.x,character_body_3d.velocity.z)
    var movement_input: Vector2 = Input.get_vector(_move_left_action,_move_right_action,_move_down_action,_move_up_action)
    var dot_product: float = horizontal_velocity_direction.dot(movement_input)

    _inertia_rotation_pivot.rotation.z = _max_rotation_angle*dot_product
Squash And Stretch
This is a classic principle highly used in animation. A nice explanation and a few examples of it can be seen on its wikipedia page.
This feature was a bit more tricky to implement, as my first approach was to bake any squashing and stretching effect right into the animations itself. I spent way too much time modifying the blender rig to support these deformation effects just for them not to work when exporting them to the Godot editor.
Facing this issue was probably for the best, as I soon realised baking them into the animations would have been a mistake. The magnitude squashing and stretching needs will change depending on the context. To illustrate this, picture the effect being applied to the character when the player lands from a certain height. The effect should be stronger when falling from a height of 20 meters than when fallign from just 1 meter.
My implementation goes as follows: First, I created a new shared component inside the player character’s FSM called SquashAndStretchHandler that has 3 public methods: punch_scale(parameters: PunchScaleParameters), scale(ScaleParameters) and reset().
These methods receive some parameters and then create a tween that changes the scale of a squash and stretch pivot Node3D which parents the mesh of the player character. These parameters are resources classes that can be tweaked from the inspector, and look like this:
extends Resource

class_name PunchScaleParameters

@export_category("Punch Parameters")
@export var punch_scale: Vector3 = Vector3.ONE
@export var punch_transition_type: Tween.TransitionType = Tween.TRANS_LINEAR
@export var punch_ease_type: Tween.EaseType = Tween.EASE_IN_OUT
@export var punch_duration: float = 0.2

@export_category("Recovery Parameters")
@export var recovery_scale: Vector3 = Vector3.ONE
@export var recovery_transition_type: Tween.TransitionType = Tween.TRANS_LINEAR
@export var recovery_ease_type: Tween.EaseType = Tween.EASE_IN_OUT
@export var recovery_duration: float = 0.2
These methods can be called from any of the states of the state machine. I am using them when the player attacks, when it suddenly starts running from an idle stance, when it jumps, when it lands…
## This is an example of how squashing and stretching is used for the Land state.
class_name PlayerCharacterLand

@export_category("Squash And Stretch Parameters")
@export var _base_punch_scale_parameters: PunchScaleParameters
@export var _squash_min_y_speed: float = 0.0
@export var _squash_max_y_speed: float = -20.0

func enter() -> void:
    super()
    # ...
    y_speed = player_character.velocity.y
    squash_and_stretch_handler.punch_scale(_get_punch_scale_parameters(y_speed))

func _get_punch_scale_parameters(y_speed: float) -> PunchScaleParameters:
    # ...
    # Return a new PunchScaleParameters that uses the base parameters and scales them using the fall speed.
Ramp Support
Most levels in this game are going to be themed after natural scenes: islands, mountains, jungles… And so far during the development of the prototype I have tested everything on nice and flat floor surfaces. The landscapes intended for the game are usually not very flat, and that means my characters should be able to move and perform actions accordingly to the ground they are standing on.
For the player character, support for ramps has three requirements: First, it should nicely move and go up and down on uneven surfaces and ramps. Thanks to the move_and_slide method of CharacterBody3D all of this is done pretty much automatically.
Secondly, when the player is on a ramp, its attacks should be launched in that direction to ensure they connect with whatever enemy or element is on it. And finally, because the player model is quite short, I want it to incline back and forth when on uneven terrain, as I feel that would look cute.
In order to achieve both things it was clear I needed to use the floor normal to orientate the visuals of the character and its attacks. I created a new shared component in the FSM called InclineHandler that receives the floor normal from the CharacterBody3D and has a method that takes a Basis and returns it aligned on its y axis to the floor normal.
func _align_basis_with_floor_normal(a_basis: Basis, new_floor_normal: Vector3 = floor_normal) -> Basis:
    a_basis.y = new_floor_normal
    a_basis.x = -a_basis.z.cross(new_floor_normal)
    a_basis = a_basis.orthonormalized()
    return a_basis
InclineHandler then calls this method every physics process frame on the Basis of a Node3D that parents the player model and the Node3D that parents the attack hitboxes. When an attack is launched, the aligned Basis of the attack hitboxes is passed to the physics query used in the aim assist system I implemented in the devlog #2 Aim Assist to make it work on any terrain.